When you design packaging for physical tapes, retro media sleeves, or nostalgic product boxes, the typography sets the tone before a customer reads a single word. Commercial retro glitch fonts for VHS tape packaging capture that specific late-1980s and 1990s broadcast error look. They help indie creators and small brands match the rough, magnetic-tape aesthetic without risking copyright strikes or low-resolution scans. You reach for these typefaces when you want cover art, spine labels, or warning text to look authentically aged while still holding a valid commercial license that covers physical product runs.
What exactly makes a typeface work for VHS packaging?
A true retro glitch typeface mimics tracking errors, chromatic shifts, and horizontal tear lines without breaking character structure completely. Designers pick these fonts to replace heavy Photoshop filters or manual distortion effects. Instead of stretching pixels, a well-built glitch font already contains uneven edges, duplicated strokes, and slight offset layers. You can drop it directly into Illustrator, InDesign, or your preferred layout software and scale it like any standard vector type. The commercial license covers you when printing on physical sleeves, selling digital mockups, or using the lettering on branded merchandise without contacting the creator again.
You can explore more analog tracking styles that work well on tape covers to see how offset layers handle narrow spine formats without bleeding into the edges.
How do I use glitch typography without losing readability?
Readability drops fast when distortion takes over. Keep your main title to one or two lines maximum. Use the heaviest weight of the font for short headings only. Reserve lighter weights or clean sans-serifs for spine text, catalog numbers, and legal warnings. Test your layout at actual print size before sending files to a printer. If the letters blend into the background at six inches wide, they will disappear when printed on a standard plastic case sleeve. High contrast matters more than heavy effects when the shelf lighting hits the rack.
Which licensing terms actually matter for commercial use?
Check the EULA before you add a font to a client invoice. Personal use licenses rarely cover physical product runs, bulk print orders, or digital resale. Commercial retail licenses usually allow unlimited copies, but some creators require an extended tier if your print run exceeds five thousand units. Always verify if the license covers merch like stickers, tote bags, or digital templates. If the font creator asks for attribution, include it in a small print line near the barcode or copyright block so you stay compliant.
For projects that need heavy distortion and broadcast-style artifacts, Magnetix offers tracking-line breaks and chromatic shifts that print cleanly on matte paper stock.
What mistakes ruin a VHS tape cover layout?
Overloading the design is the most common issue. Designers stack glitch fonts with scanlines, halftone dots, and heavy drop shadows, which turns the artwork into visual noise. Another problem comes from using low-DPI exports for print. Always keep your working file at 300 DPI or higher, and export to PDF/X-1a with embedded outlines. Bleed settings matter too. VHS sleeves often wrap around plastic cases, so leave at least a quarter-inch margin on the edges where text might get folded or trimmed. Avoid placing important credits directly over the spine fold.
If your design leans into early video game graphics, these 1980s arcade typefaces show how to pair distorted headers with clean body copy so the layout stays readable at small sizes.
How do I keep the texture authentic without hurting print quality?
Paper stock changes how distortion looks on the shelf. Uncoated matte stocks absorb ink differently than glossy laminates. Run a quick proof on your chosen material before approving the final batch. If you want that broadcast-monitor feel, add a subtle halftone or duotone background instead of cranking up the font distortion. You can also layer a transparent PNG tracking pattern behind clean text to mimic VHS tracking without sacrificing legibility. The goal is texture, not broken letters.
Designers often pair tape artwork with monitor-style textures, and CRT scanline type treatments work well when you need to separate the title block from the rest of the layout.
What should I check before sending the final file to a printer?
Print shops reject files for predictable reasons. Outline your text to prevent substitution. Convert all embedded images to CMYK, and make sure black text reads 100% black instead of a rich CMYK mix. Check your trim lines, safe zones, and barcode clearance space. Keep the glitch effect inside the safe area so the cutter does not slice through the tracking lines. Run a physical proof at 100% scale. Look at it under different lighting. If you can read the title from three feet away without squinting, you are ready to hit send.
Before you start your next packaging run, run through this quick checklist:
- Confirm your font license covers commercial printing and physical merchandise
- Keep the main title to three lines or fewer using the heaviest available weight
- Place credits, barcodes, and spine text in a clean, high-contrast sans-serif
- Set your document to 300 DPI with bleed and safe zones marked
- Convert all text to outlines and switch colors to CMYK before export
- Print a physical proof at full size to test readability and color shift
- Verify trim clearance so tracking lines do not get cut off the sleeve edge
Once your proof passes the readability test, lock the files, export a final print-ready PDF, and move straight to production without last-minute layout fixes.
Explore Design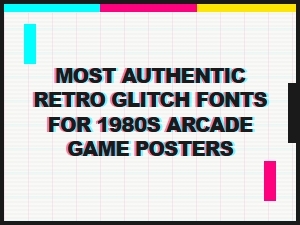 Authentic Glitch Fonts for Vintage Arcade Posters
 Dystopian Sci-Fi Branding with Vintage Glitch Fonts
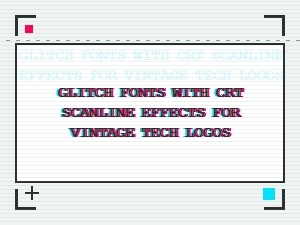 Authentic Crt Scanline Glitch Fonts for Retro Tech Logos
 Master the Tape Cover with Analog Glitch Fonts
 Top Glitch Fonts for Dystopian Sci-Fi Poster Design
 Modern Glitch Font Pairings for Tech Startups